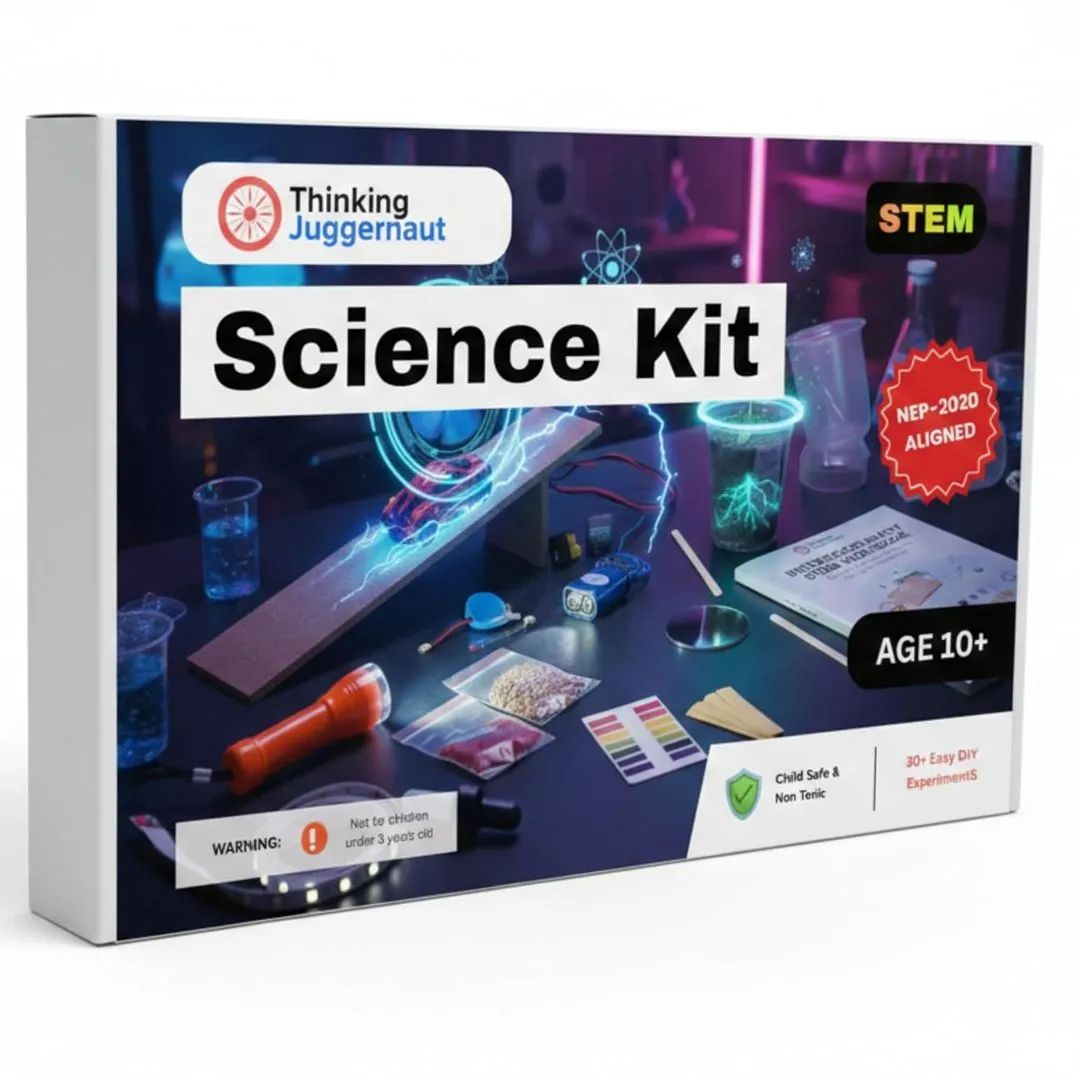
⭐ Everything in one box!
Science makes the most sense when students stop reading about it and start doing it. A good science project teaches children to ask a question, form a hypothesis, test it, and draw a conclusion — skills that go far beyond any single subject and well beyond what any exam can assess.
The most important habit to build at this stage is writing down what you expect to happen before you run the experiment — and then comparing it honestly to what actually happened.

Objective: To observe how the steepness of a ramp changes how fast a toy car travels.
Materials: A smooth wooden board or thick cardboard, a small toy car, books to prop the ramp, a measuring tape, and a phone stopwatch.
Procedure:
What students discover: Speed increases with slope height, but not in a straight-line way. A steeper ramp gives more stored energy at the top, and that converts to faster movement at the bottom.
Extend it: Try the same ramp on different surfaces — a smooth wooden floor, a rough cloth, a plastic mat. Students will observe that the surface material changes how far the car travels even when the ramp height is identical. This introduces friction as a variable separate from slope.
Connect to real life: Road engineers use the same principles when designing highway ramps and speed bumps. Why do speed bumps work? Because the rough surface and the forced incline both absorb kinetic energy.
This is the same ramp setup but with a scientific thinking layer added. Before starting, students must write a prediction:
If the ramp height doubles, I think the speed will: (a) stay the same (b) increase a little (c) increase a lot (d) exactly double
What the data shows: Speed does NOT double when height doubles. It increases by roughly 1.4 times. This is because speed depends on the square root of height, not height directly — a concept from energy physics that Class 8 students can verify themselves with real data, not just read about.
This experiment builds one of the most important scientific habits: distinguishing between what you expected and what the evidence shows, and being willing to update your thinking.

Write a conclusion: Students should write 3–4 sentences explaining the result — not just stating what happened, but reasoning through why it happened.
The Thinking Juggernaut Interdisciplinary STEM Kit (Age 10+) includes a wooden ramp board, toy car, and measuring tape — exactly what is needed for both versions of this experiment. The 64-page workbook guides students through measuring slope angles, calculating average speed across multiple trials, and plotting results on graph paper to visually confirm the pattern.
Objective: To make a natural pH indicator from turmeric and test common household liquids.
Materials: Turmeric powder (haldi), water, white paper strips or cloth strips, lemon juice, soap solution, baking soda solution, vinegar, plain tap water.
Procedure:
What to observe: Turmeric stays yellow in acidic liquids (lemon juice, vinegar) and turns reddish-pink in basic liquids (soap, baking soda, washing powder). Tap water will show little or no change.
Why this works: Turmeric contains a compound called curcumin that changes its molecular structure in basic (alkaline) conditions, which shifts its colour. This is the same chemical principle behind all pH indicators — just using a kitchen ingredient instead of laboratory chemicals.
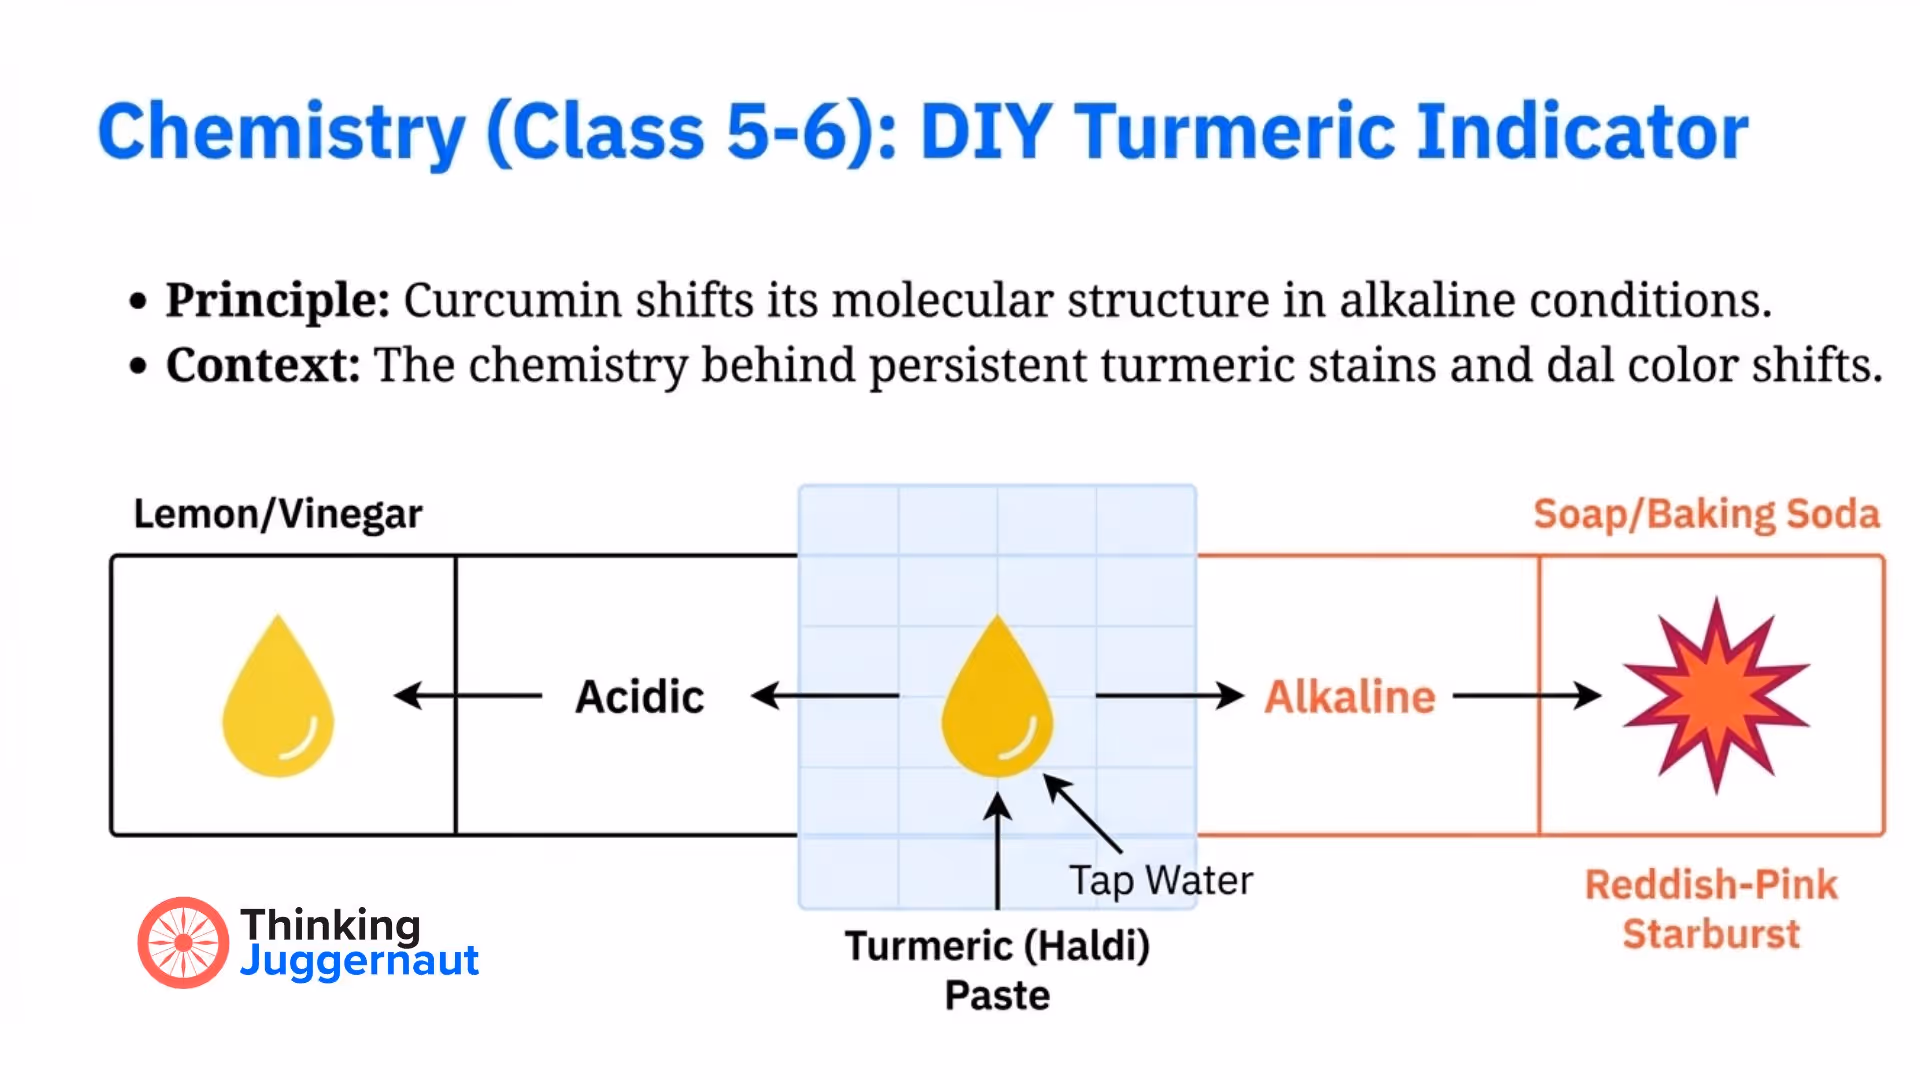
Why this matters in an Indian context: This experiment connects directly to Indian cooking and preservation. Why does turmeric stain clothes and surfaces so persistently? Why does the colour sometimes shift when turmeric is added to dal with certain spices? The chemistry of pH is at work in an Indian kitchen every day.
Objective: To observe how varying levels of acidity affect plant leaves over 5–7 days, simulating the effect of acid rain on vegetation.
Materials: 3 fresh leaves of the same type (tulsi, curry leaf, or rose work well), 3 cups, plain water, vinegar or lemon juice, pH paper strips if available.
Procedure:
What students discover: The leaf in plain water remains healthy. The leaf in weakly acidic water shows gradual yellowing and spots. The leaf in strongly acidic water deteriorates fastest, often showing brown patches and softening within 3–4 days.
Why this is significant: Normal rain in India's cities increasingly has a pH below 5.6 due to vehicle emissions and industrial activity. Students observing this experiment with tulsi or curry leaves from their own home are seeing a real environmental phenomenon, not a textbook abstraction.
Connect to current events: Ask students to research the Air Quality Index of their city on a recent date and connect it to what they observed.
Both the turmeric indicator and acid rain simulation are part of the Thinking Juggernaut Interdisciplinary STEM Kit (Age 10+), which includes pH paper strips with a colour chart, a dropper, measuring cup, gloves, and colour powder — so students can compare their DIY turmeric results against precise pH measurements. View kit →

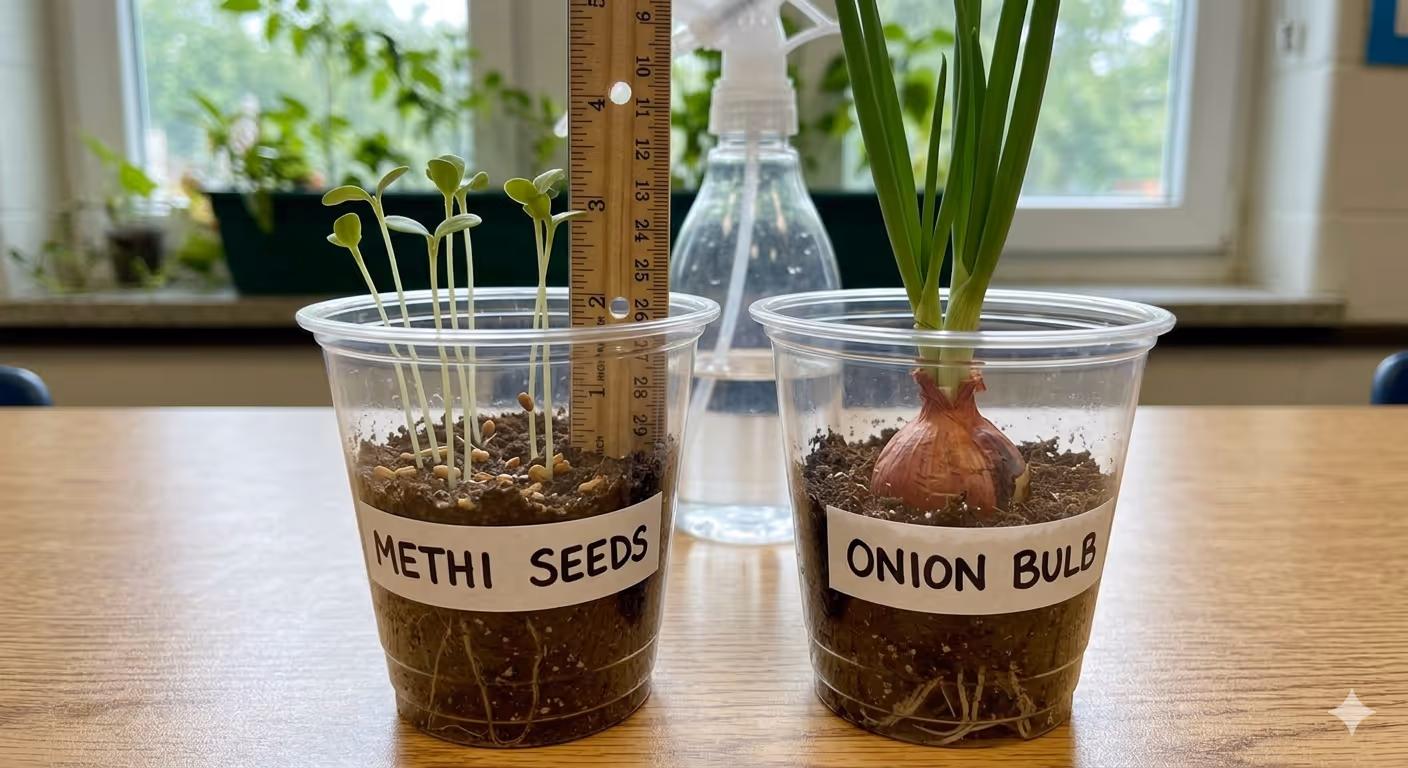
Objective: To compare germination and early growth between a seed (methi/fenugreek) and a bulb (onion), and observe how each uses stored nutrients differently.
Materials: Methi (fenugreek) seeds, a small onion, one pot or cup with soil, water, a ruler.
Procedure:
What students discover: The onion typically shows growth sooner because it already contains stored food in the bulb. Methi starts slower but catches up as its roots establish. Root structures differ significantly — this is a clear visual demonstration that plants use different strategies for early growth.
Why methi and onion: These are found in every Indian kitchen and germinate reliably within days, which keeps students engaged. The comparison between a seed and a bulb also introduces vegetative propagation — a concept in Class 7 Biology — in a concrete, observable way.
Objective: To test how quickly water drains through different soil types and understand how this affects crop choices.
Materials: A cup with a small hole at the bottom, potting soil, garden soil or red soil, sand, a bowl to collect draining water, a phone stopwatch, 10 ml of water measured in a small cup.
Procedure:
What students discover: Sandy soil drains fastest (large gaps between particles). Fine red soil or clay drains slowest (tiny gaps). Potting soil falls in between.
Connect to real life: Indian farmers have been choosing crop varieties based on local soil type for centuries — rice in clayey waterlogged soil, millets in sandy fast-draining soil. This experiment is the scientific basis for those farming decisions. Students who understand permeability understand why a paddy field and a wheat field look nothing alike.
Where the interdisciplinary angle comes in: This project does not have to stay inside Biology. Students can measure sprout height daily and plot growth on a simple graph (Maths), discuss how soil composition affects water retention (Geography/Environmental Science), and connect germination conditions to Indian farming practices — why rabi crops are sown in winter, why kharif crops need monsoon moisture. One experiment, multiple subjects — this is exactly what NEP-2020 means by interdisciplinary learning.
Kit option: The Thinking Juggernaut Interdisciplinary STEM Kit (Age 10+) includes potting soil, seeds, transparent cups, and a dropper — all the materials for this experiment — along with guided activities on soil absorption, sedimentation, and plant growth as part of its 30-experiment workbook. The kit is built around the idea that science, maths, and environmental thinking belong together, not in separate boxes.

Objective: To test which household materials allow electricity to pass and which block it, and to classify them as conductors or insulators.
Materials: A battery, battery holder, LED bulb, resistor, connecting wires, and a set of test objects — a safety pin, coin, rubber band, eraser, pencil graphite (from a broken pencil), piece of plastic, small paper strip.
Procedure:
Interesting result: Pencil graphite conducts — most students are surprised by this. The graphite core of a pencil is carbon in a crystalline form, which allows electrons to move. This opens a conversation about why pencil lead is called "lead" (it isn't — it has never contained lead), and what carbon's role is in materials science.
Why the resistor matters: This experiment also illustrates why electricians use protective components. Without a resistor, an LED connected directly to a 9V battery burns out immediately. The resistor limits current flow — a safety principle that applies to everything from household fuses to industrial circuit breakers.
Objective: To find and fix deliberate faults in an electric circuit — building systematic diagnostic thinking.
Setup: A parent or sibling builds a working circuit (battery, LED, switch, resistor, wires), then introduces one or two faults — a loose wire, a reversed LED, a missing resistor — without telling the student what was done.
The student's task: Examine the circuit without randomly pulling things apart. Check one component at a time in order. Fix the fault and document what was wrong and how it was diagnosed.
Why this project is more valuable than a standard circuit project: Building a circuit that works teaches one thing. Finding out why a circuit has stopped working teaches a completely different set of skills — systematic observation, isolating variables, and structured reasoning. These are the same skills used by electronics engineers, software developers, and medical diagnosticians.
The Thinking Juggernaut STEM Kit (Age 10+) includes a battery holder, 9V battery, LED, 1kΩ resistor, motor, fan, switch, and connecting wire — all the components needed for both the conductor detective experiment and the troubleshooting challenge, along with guided workbook pages that walk through each step. View kit →
Whether for a school science fair or a class submission, how a project is presented matters alongside what was done.
Structure that works:
The hypothesis and the further questions sections are what distinguish a thoughtful project from a procedure demonstration. Most students skip both — which is why including them makes a project stand out immediately.
What are good science project ideas for Class 5 and 6?
Projects that produce visible results quickly and use a single clear variable work best at this level. The ramp speed experiment, DIY turmeric indicator, seed germination, and the density detective (testing whether carrots and radish sink or float in plain water versus salt water) are all well-suited. Results appear within one session or within a few days, keeping students engaged throughout.
What science projects are suitable for Class 7 and 8?
Class 7–8 students should work with projects that require a written hypothesis before starting and a reasoned conclusion at the end. The acid rain simulation, soil permeability test, conductor detective, and circuit troubleshooting challenge all meet this bar. These also connect directly to topics covered in Class 7 and 8 Science.
Can all of these be done at home without a lab?
Yes. Every project in this guide uses materials from home or from a local store or from Thinking Juggernaut Store
How long do these projects take?
Single-session projects (turmeric indicator, conductor detective, ramp speed) take 30–60 minutes. Observation-based projects (acid rain simulation, seed germination, soil decomposition) require 5–7 days of daily recording, which is itself a useful practice in sustained scientific observation.
What is the difference between a science project and a science experiment?
An experiment tests one specific hypothesis under controlled conditions. A project includes an experiment but also involves a question, a hypothesis, recorded observations, and a written or presented conclusion. For school assessments, students are typically expected to submit a complete project rather than just a procedure.
What if the result does not match the hypothesis?
This is not a failed experiment — it is the most valuable kind. Write down what you expected, what actually happened, and what might explain the difference. Every major scientific discovery began with a result that did not match the prediction. Judges at science fairs specifically look for students who can reason through an unexpected result.
Thinking Juggernaut offers NEP-2020 aligned hands-on learning kits, founded by IIT and NIT alumni. The Interdisciplinary STEM Kit includes 30 structured experiments across physics, chemistry, biology, and environmental science — with all materials and a guided workbook included. Explore all kits →
Projects build practice. The Thinking Juggernaut STEM kit that brings together Science, Technology, Engineering and Maths — through 30 creative experiments and activities kids can do at home. This is kit designed around NEP 2020’s “learning by doing” idea, this kit helps children see science everywhere.

Designed by IIT & NIT Alumni · NEP-2020 aligned · Trusted by parents across India
Explore Kits
Free Resources
Related Reading
Almost there!
We will confirm your order on WhatsApp
Order placed!
Thank you! You will receive a WhatsApp confirmation shortly.